Saturday, December 31, 2011

Happy New Year - Bonne Année!!

Happy New Year to everyone who takes the time to read the little tidbits I write....
Bonne Année à vous toutes qui prenez le temps de lire les petits messages que j'écris... si peu souvent!

Happy New Year!


Bonne Année!

I have been missing in action for the last month and a half.  I was travelling in Europe... took some wonderful photos and attended my daughter's MBA diploma presentation at University Paris-Dauphine.
Wonderful memories to share in the New Year.

I hope that you all had a wonderful peaceful Christmas!  Wishing you a wonderful, healthy New Year!

Julie and me at Paris-Dauphine Executive MBA Diploma ceremony
Julie et moi à Paris-Dauphine pour la cérémonie de remise des diplômes MBA Exécutif
Jim and Julie at Olympia, Greece, site of the first Olympics
Jim et Julie at Olympe, Grèce, site des premiers Jeux Olympiques


Je manquais à l'appel pour les derniers 2 mois.  J'étais en voyage en Europe.  J'ai pris des centaines de photos et j'ai assisté à la cérémonie de graduation de ma fille pour son MBA exécutif à Paris-Dauphine!
Quel voyage - je compte bien partager mes souvenirs à la Nouvelle Année.


J'espère que vous avez toutes eu un très beau et paisible Noël.  Je vous souhaite une nouvelle année remplie de bonheur (et en bonne santé - tout se prend mieux quand on a la santé!).


A bientôt en 2012!

Wednesday, November 16, 2011

Second Little critters card

I am just reposting the second card for the Penny Black and other challenge at All sorts...

oops forgot the link for the challenge... you will find it here.

The details are in my previous post here.


Click on image to view bigger
Penny Black Winter Wonderland


Thanks for visiting my blog!
Merci de votre visite!


Penny Black Little Critters cards

I have shown my Penny Black Fashion Girls cards and my little Mimis cards, but I didn't show you my Little Critters cards....

So here are 2 of them.  I love those little critters... especially the hedgehogs!  I know there not for everyone, but there are so cute....

Click on image to view bigger
Penny Black Winter Wonderland

Supplies:
Penny Black Winter Wonderland stamp set 30-083, mice on leaves
Snowflake Background:  Impression Obsession (CC066 C-A-C Snowflakes) stamped in Versamark, embossed with White embossing powder.
Cover background over snowflakes with Blue Distress ink
Draw and cut hills (mark the top of the hills with a black marker or the edge of a Stazon pad to match the stamp image).
Greeting:  A very Merry Christmas:  Penny Black Let it snow 30-086
Christmas tree:  Tim Holtz Sizzix die
Stickles:  all over tree and on hills (Stardust)
Card base:  5 ½ x 5 ½” Stardream blue (cut 5 ½” x 11”, score at 5 ½”)
White mat:  5 ¼” x 5 ¼
The image was coloured with Tombo markers.

The second card:  (The photo is not so great.... sorry)

Click on image to view bigger
Penny Black Winter Wonderland

Edit 16/11/11 Sorry to everyone who couldn't see the image above... I think I fixed it...

Supplies:  Winter Wonderland stamp set, cat with gifts image
Greeting Be merry: The Penny Black little snowflake set (#?)
Card base:  Navy Blue cardstock, 5 ½ x 5 ½” (5 ½” x 11, scored at 5 ½”)
Striped Patterned Papers:  5 ¼ x 5 ¼”
Blue shimmer cardstock:  Cut with Lace scallop Spellbinders(4 ¼” circle)
White CS for stamping:  cut with circle Spellbinder (3 ½”), cut 4 x 4”
Satin turquoise ribbon 
Mini tag:  Martha Stewart Mini tag punch (scalloped tag M283000) - White CS scrap (stardust white)
Image coloured with Tombo markers:
Blue 452 and 373, Green 173, Pink 761, Brown 990, 992 and 977
Glossy accents: Ranger (to accent some of the gifts)
Black Stazon ink to stamp image


P.S.  I forgot to mention that I would like to enter these cards in the Penny Black and more at All Sorts Challenge here.  They have a new challenge for November and the subject is "All creatures great and small".  So I think that my little critters qualify, don't you? 

Thanks for visiting my blog!  And thanks in advance for your comments.  I always appreciate!

Merci de visiter mon blog and merci à l'avance pour vos commentaires.  Ils sont toujours appréciés!


Monday, November 7, 2011

Sympathy card - carte de sympathie

A quick share tonight!

A Sympathy card I made for Julie's friend.


Click on image to view bigger


Ingredients:
Everything used is from Stampin'Up, except the background paper (Basic Grey Wisteria 6 x 6 paper pad).

Stamps:
Flower:  Love and Sympathy
Greeting:  Voeux mignons
Gems: Stampin'Up crystals
Ribbon:  Omer de Serres craft store

The flower was colored with markers.  The image was distressed with Tim Holtz Forest Moss Distress ink.  The whole image and part of the card was sprayed with Sheer Shimmer Spritz.

The purple and green CS are from Stampin'Up (Pear Pizzazz and Bordering Blue).

Thanks for visiting my blog.  Merci de votre visite.

Friday, October 28, 2011

Penny Black Little Christmas Mimis

Here are 3 more cards I made for Christmas classes at my Local Stamp Store, Bonnidée.  (I am giving it again on Saturday, Oct. 29th if you're interested).

They all feature the lovely little Mimi!  Isn't she cute?


Supplies:
Stamps:  Little Mimi with door Welcome to Mimi’s 4190K
Cardstocks: Green CS for card base: 5 x 7
Patterned paper:  Kayser Craft
Lime green CS cut with Nestabilities Label 8
White CS for stamping:  Watercolour CS also cut with Nestabilities Label 8 
Red CS for poinsettias and for scalloped border
Nestabilities dies:  Labels 8 and scalloped Edgeabilities
Poinsettias die:  Marianne's die
Gem for center of Poinsettias:  Kayser Sparklets
Glue and glitter for snow and snowflakes
Ribbon: May Arts


Supplies:

Stamps:  Bear Hug 4188K
Cling Circles and Lines 40-084
Greeting:  Clear Acrylic set Let it snow 30-086
Jet Black Archival Ink
Tombo markers
Viva Pearl Pen Ice White
Stardust Stickles
Spellbinders Edgeabilities Classic Scallop
Spellbinders Nestabilities Petite Scallops
Distress Ink Worn Lipstick
Punch 1 ½” circle
Color Box Cream White pigment ink
Blue embossing powder (Stampin'Up)
Cardstock: 
White CS for stamping, Pink Bazzill CS, Green CS, Blue shimmer CS (darker on reverse), 
Stardust white for card base:  5 ½” x 6”
Little bell


Supplies:

Supplies:  Stamps:  Little Mimi:  Mimi dear 4187J
Greeting and Holly: Let it Snow clear acrylic stamps 30-086
Background:  Retro pattern 40-086
Inks:  Black ink for stamping
Red ink for stamping on red and for greeting
Papers and cardstock:
Cardbase:  Red: Ruby slippers  (5 1/2 x6 ½”)
Patterned Paper: Graphic 45 Christmas Emporium Special Delivery #4500371 
Green for border: Bazzill green 
White for stamping image and greeting: Watercolour CS 
Martha Stewart Holly Border Punch:  Holly Leaves 42-60035
Spellbinders Nestabilities Scalloped Rectangles
Spellbinders Tags (for greeting)
Red and white polka dots ribbon
Red and white butcher twine
Glue Pen and Crystal glitter (for antlers)
Tombo markers
Gems:  1 large red for nose, 3 little red gems for holly on greeting
Foam tape (little squares)


Thanks for visiting my blog!  Merci de votre visite.


Happy Birthday Jim

It was my husband Jim's birthday last week!

Happy Birthday Jim!

Here is the card that I made for him.  I got a Silhouette machine on sale last year - this is the first time that I use it to make a card!  Jim is a car nut...:)  So I found this old car diecut and made this card.  Both Jim and my son knew right away the car model and year... (A chevy Belair I think they said...?)...
Anyway, he liked it!!!!

Click on image to view bigger


Thanks for looking!  Merci de visiter mon blog!


Monday, October 24, 2011

Penny Black Christmas Belles

Just a quick post to show 3 cards I made with the Penny Black Christmas Belles.  They are so elegant aren't they?  Love them!!!

(I did those cards as a workshop at my local stamp store, Bonnidée...).

Penny Black Christmas Belle sitting on ornament
 
Stamp:  Penny Black Simply ornamental 4214K
Greeting: Penny Black Clear stamps “Winter Wonders” 30-087
Cardstock and papers:  Magical teal CS for cardbase 5 ½ x 5 ½”
Pale teal CS, Graphic 45 patterned paper Believe #4500363, Canson Watercolour paper
Viva ink gold creame (Gold #901), Viva Pearl Pen #101 Ice White,
Distress ink Pine Needles, Mini green gems, Gold Krylon paint pen
Green glitter pen, Tombo markers, Glue pen and crystal glitter, Star gems


Penny Black Christmas Belle with gifts 
  
Stamps:  Penny Black Fashion Delivery 4213K, Penny Black cling Christmas pride 40-075
Greeting: Penny Black Clear stamps “Winter Wonders” 30-087
Papers:  Bazzill Green for card base 5” x 6 1/8,   
White textured pearly cardstock, scrap for stamping greeting, Pink Bazzill CS 
White vellum with gold writing, White CS for stamping girl and poinsettias:
Spellbinders Nestabilities Oval for greeting
Distress inks:  Victorian Velvet and Old Paper
Perfect pearl spray (Perfect pearl dissolved in water)
Tombo markers, Puffy paint, Crystal glitter, Gold Gel pen, Memento Tuxedo Black ink


Penny Black Christmas Belle sitting on gift (click on any image to view bigger)


Stamp:  Penny Black Fashionably Wraped 4212L
Cardstock and Papers:  Red Shimmer cardstock for cardbase  5 ½ x 5 ½”,
Lime green Cardstock  Green patterned papers , Red Glitter CS 4” scalloped circle,
White CS for stamping
Embossing folder (for creating dots on gift)
Tombo markers, Glitter Gel pen, Red Stickles, Red velours ribbon

Just leave a comment if you have any questions!

Thanks for your visit!  Merci de visiter mon blog.


Penny Black Challenge

A last minute little tag for the Penny Black Blog Challenge.

Click on image to view bigger
The details:

I used a Penny Black Hedgehog stamp, coloured with Tria markers.
The image was cut out and mounted on the green circle with foam tape.
The image was also accented with a Sakura Clear star Jelly roll (on the ribbon and the dots of the gift).
I also made a faux stitching line around the green circle with the same Jelly roll pen.
The green circle started out as white and was distressed with Tim Holtz Distress inks Peeled Paint and Shabby Shutters.
The green circle was cut with a Spellbinders Nestabilities Circle die.
The red circle was cut with a Spellbinders Nestabilities Lace scallop circle die.
The polka dot ribbon is from Wallmart.
I punched 2 small slits to thread the ribbon with a McGill long reach punch.

Thanks for your visit!  Merci de visiter mon blog!

Sunday, October 23, 2011

Happy Halloween once more....

Here is another card that I made with the same Penny Black stamp as in my previous post.

Click on image to view bigger


I love this little mouse!  (and I don't like real mice, but I loved coloring this one!)  The image was again colored with Tria alcohol markers and cut out. The "Trick or Treat" is from an Impression Obsession clear set and stamped in Momento Tuxedo Black. The patterned papers are from a K&Co. pad.
The mouse was glued on the patterned papers with foam dots. The pumpkin was covered with Glossy accents for shine. I also applied Sakura star gel pen on the broom. (Difficult to see on the photo, but there is glitter there...)

(I will also enter this card in the Penny Black Saturday Challenge here for their "Too cute to spook" challenge and for Penny Black at Allsorts blog challenge here:  I think that my colours are pretty close (just missing the turquoise).


Thanks for looking!


Happy Halloween

I had said that I'd be back tomorrow in my last post... Well this is a few days later....

I have a quick card to share:

Click on image to view bigger


The cute little mouse image is by Penny Black.  Is is coloured with alcohol markers (not Copics - I colored the image while I was on Holidays and I only brought my "Tria" markers. The pumpkin was covered with Glossy Accents.  The spiders and "Happy Halloween" are from an Impression Obsession set. The spiders were covered in glossy accents. I did a row of "fake" stiches with a Copic Black fine marker around the orange "spiderweb" cardstock.  The orange  paper is from a Cloud 9 Designs pad and the black is from K& Co.

(I am entering this card in the Penny Black Saturday challenge here.  The theme this week is:
Too cute to spook! )

Thanks for looking!  Merci de votre visite!


Wednesday, October 19, 2011

Julie's Graduation

We had a very proud moment in our family this weekend!

My daughter Julie finished her eMBA (Executive MBA) and received her Diploma this weekend.
She has worked very very hard for the last 2 1/2 years and put her life on hold to get this diploma.
She did it very successfully... (she doesn't want me to mention her "first letter of the alphabet" grade anymore :)  )

We were so very proud of her!!!
Here is a photo of my beautiful daughter, the MBA Graduate:

Julie Charlton, eMBA Graduate, October 2011


Here is another photo of the Graduate with her proud parents:


OK I'll be back tomorrow with more projects to show you.... I have lots of cards done, but they are not photographed and ready to show yet....working on it...

Thanks for visiting my blog!  Merci de votre visite.


Graphic 45 Christmas Door

When I was at CHA this summer, I fell in love with the Graphic 45 booth and papers. I think that if I wasn't in classes, I was either in the Graphic 45 or the Kayser Craft booths studying their projects. Two of them were particularly special to me. I will share one of them with you now and the other one later on.

This first project is from Graphic 45. I took photos of the amazing creation. I don't know who the creative artist is... So if you are or know who is, please let me know and I will give credit where credit is due. So, from the photos I took, I re-recreated the project as best as I could. It was so beautiful as is, so I didn't change anything... except that I couldn't find a door at an affordable prize (on the Net, doors were in the $20 range), so I made my own out of chipboard.

The papers are from the Graphic 45 Christmas Emporium collection. I just love this Santa. He is so peaceful looking and not scary at all like some other Santas... I also love the way the little children are looking in the window behind his shoulder.

I taught this project as a workshop at Bonnidée - if you are interested, I think that there is a waiting list for a repeat....


This is the left side of the box.


This is a view of the box from the top


The front of the project (there is a mini accordeon book behing the door)


The front of the project with the door open


A close-up of the door


The right end-side panel


Sorry about the poor quality of some of the pictures.  I will try to redo them.

Thanks for visiting my blog!  Merci de votre visite!

Wednesday, October 5, 2011

New Home card

Another card for a new home (for a friend of Julie's):

I used the same stamp as I did last time here and changed the colours:

Click on photo to view bigger
The image is by Whipper Snapper coloured with Copic Markers.
Both the image and the black mat were cut with Nestabilities dies.
The background blue sparkle paper is I think by SEI, but I'm not sure.... sorry
The card base is Stardust white CS.
The flowers are Prima and the gems in the flowers are by Stampin'Up!
And I wrote the greeting by hand.

Thanks for your visit.  Merci de visiter mon blog!

Louise

Tuesday, October 4, 2011

Halloween is coming!

I have been away on a Miata trip for the last 2 weeks!  We met with a large Miata group for the first week (100 cars) and for the second week, Jim and I went to the Berkshire Mountains of Massachusetts.  I was very relaxing! I brought my markers and some stamped images with me, so that I could do a little bit of coloring at night.  I managed to do quite a few images and I am slowly putting cards together.  I'll try to share a few now and in the coming days.

I did a few Halloween cards.  Here is the first one:

Click on image to view bigger


The image is by Penny Black, don't have the name (it was an image exchanged with my friends).
It was colored with alcohol markers.  I went over the cape with a black marker because it was uneven with only ink.  I used glossy accents on the "Trick or Treat" bag.  The image was cut out and raised with foam dots (it has a nice "dimensional" look in real life).  

The two little spiders were a good find at a big chain store.  Aren't they cute?  I glued them with glossy acents and gave them some black gems eyes (Hero Arts) and I drew the little wiggly lines to mimic the larger spider that was part of the patterned paper.  The large spider was also covered with Glossy Accents.  The cat was glued (with foam dots as mentioned above) on this fancy piece of patterned paper by K&Co.  The border is part of the paper and my card base is orange (Pumpkin Pie by Stampin'Up).  (The black around the card is my photo background - not part of the card).

I'll be back with more!

Thanks for visit.  Merci de visiter mon blog!

Louise


Monday, October 3, 2011

Penny Black Blog Contest

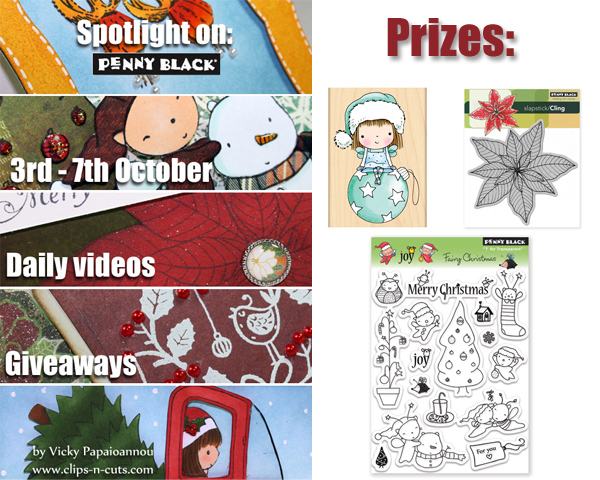
I love Penny Black stamps!  and Vicky (from Greece) who I had the pleasure of meeting at CHA, is having a Penny Black week on her blog and she also has a contest.  


Here is the photo of the event:


You can see her blog here: (she does great videos!)


Here is a photo from CHA of Vicky and Deborah from the Lily Pad Cards Blog:

Vicky from Greece and Deborah from the US and me at CHA 2011
I'll be back with new cards later!!

Thanks for visiting my blog.  Merci de votre visite.

Louise

Friday, September 16, 2011

Gift card holder

Here is the inside of the card shown here.


Click on image to view larger

I used a Sizzix die to make the gift card holder inside the card.

It's a little intimidating to figure out, but I checked out a video by Karen Burniston and she makes it very simple to figure out.  You can see the video here. This sure makes a nice way to present a gift card.  I will be using again very soon!

I blurred out the words written for my friend, so the right side of the card looks a little weird... :).

The border in blue is Stardream cardstock cut with a Stampin'Up punch.

I added the little blue border around the gift card and used glue and fine glitter to decorate it.

Thanks for visiting my blog.

Merci de votre visite.

Bonne Fête Chère Lucienne

Voici une carte que j'ai fait pour une amie qui célèbre ses 60 ans.  Bonne Fête ma chère Lucienne!

Encore une fois, je me suis inspirée d'un vidéo de Jennifer McGuire pour Hero Arts.

Voici la carte:

Cliquez sur l'image pour voir en plus grand


L'étampe de fleur est de Hero Arts (S5482- Ruffled Flower)), embossée à chaud avec de la poudre blanche, puis colorée avec les Distress Inks de Ranger (Tumbled Glass et Sapphire Blue) puis vaporisée avec les Perfect Pearls dilués dans l'eau. J'ai étampé 2 fleurs et j'ai utilisé une fleur au complet et seulement la partie centrale de la 2ème.  Je les ai placées une sur l'autre avec des petits carrés de mousse (foam dots).

Les feuilles sont étampées sur du carton vert et embossées en blanc.

Le fond est couvert par les petits pois de Hero Arts qui j'ai couvert de Glossy Accents.
j'aime beaucoup l'effet!(une autre idée de Jennifer McGuire).

Le Bonne Fête vient de chez Bonnidée et est étampé en noir (Ranger Jet Black Archival Ink).

Les perles sont de Stampin'Up!.

Le carton bleu est un carton Stardream.  Le bleu plus pâle (pour le souhait) est de Stampin'up et j'ai distressé les bords avec l'encre Distress.

Je vous montre l'intérieur de la carte (vraiment spécial!) dans mon prochain message!

Merci de votre visite!

Thanks for visiting my blog!  (If you need the information in English, please do not hesitate to contact me!

Sunday, September 11, 2011

Happy First Wedding Anniversary!

Today, Sunday September 11th,  my son Bobbie (oops Robert...) and his wife Marissa are celebrating their first Wedding Anniversary! It is hard to believe that it has already been a year since that special day when they got married.  It was a very beautiful wedding!

Here is a photo of the beautiful couple:

Bobbie and Marissa on their Wedding Day, September 11th 2010
This week I lost track of time (more than usual for those of you who know me and are smiling...).
I did not realize that their wedding anniversary was this weekend already... so I made our card (Jim and I) for them quite at the last minute.  It is very simple... I had lots of ideas to make it more elaborate, but I ran out of time and this is the card that we gave them:

Click on image to view bigger
The card is 5 x 7, and the card base is Stardream Shimmer white cardstock.
The Patterned paper is by Best Creations and it doesn't show very much in the photo, but the white is embossed and glittered.

The "Happy Anniversary" is stamped in Jet Black Ranger Archival ink and the stamp is by "Stampin'UP!".  The shape is cut partly with a Nestability die "Labels 10" (the top and bottom of the die are missing (on purpose..)).  The gems are "Out to sea" Queen and Co.

For the inside of the card, I used a new Sizzix die, called "Floating Frames 3D".

Click on image to view bigger

I used the "Nestabilities Label One small" to cut the little photo and to cut a small shape for the little text (out of blue Stardream cardstock).  I inserted both die cuts within the little frames of the Pop-up.

Here is a close-up of the floating frames:


The bottom of the card is decorated with a heart border, cut with a Martha Stewart border punch.

So Happy First Wedding Anniversary Bobbie and Marissa.  Wishing you Happiness and Love!  We love you very much!!

For everyone else, thanks for stopping by my blog and thanks for the comments - they are very appreciated!

Merci de votre visite et merci de me laisser un commentaire!  C'est toujours apprécié!